How to fix the “Failed to obtain IP address” error on Android
Wi-Fi has become a vital commodity, just like electricity. Our work often depends on it. A failed connection can be annoying or even costly, and the “Failed to obtain IP address” error message that Android users sometimes get means just that. Read below how to deal with it on your Android device.

Contents
What does “Failed to obtain IP address” message mean?
The “failed to obtain IP address” error appears when a user may try to connect to a Wi-Fi network. A router assigns an IP address for any connecting device. Your device must obtain this address to be able to connect to a router. This message means that there is an IP configuration failure, and the user is unable to join a Wi-Fi network.
Here are the most frequent reasons for that:
- Poor Wi-Fi signal. In this case, you should reduce the distance between your device and the router.
- Your device does not operate properly with the set encryption method.
- Problems with your router. If you’re still trying to connect, it could be either its malfunctioning or configuration issues.
- Enabled MAC filtering. Your address might not be allowlisted.
- Software or configuration problems of your device.
6 ways to fix the “failed to obtain IP address” error on Android
Reconnect to a network
It is the first and simplest method you should try. When you do this, the router forgets the previous attempt and initiates a new process to assign you an IP address. If the issue is due to temporary interference, this should help. You can do this by following these steps:
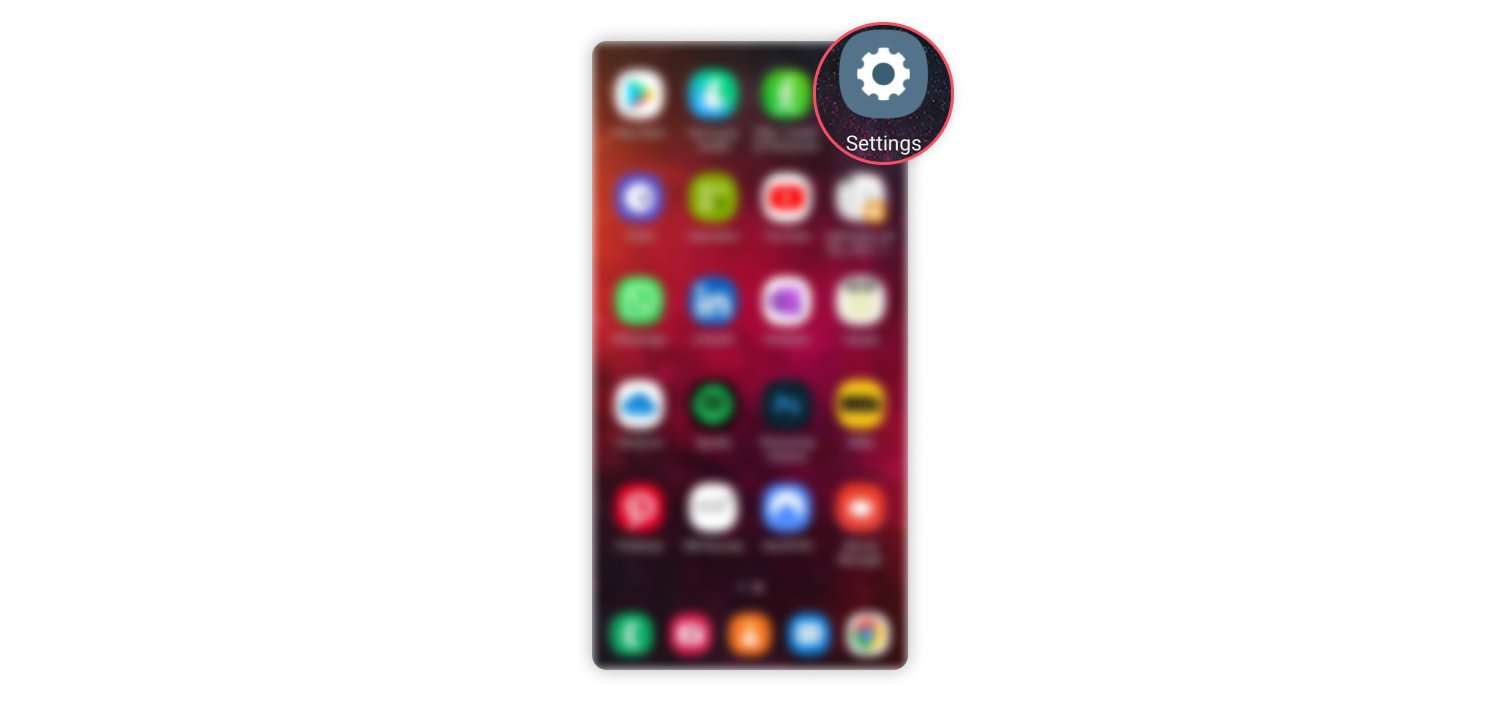
- Go to “Settings.”

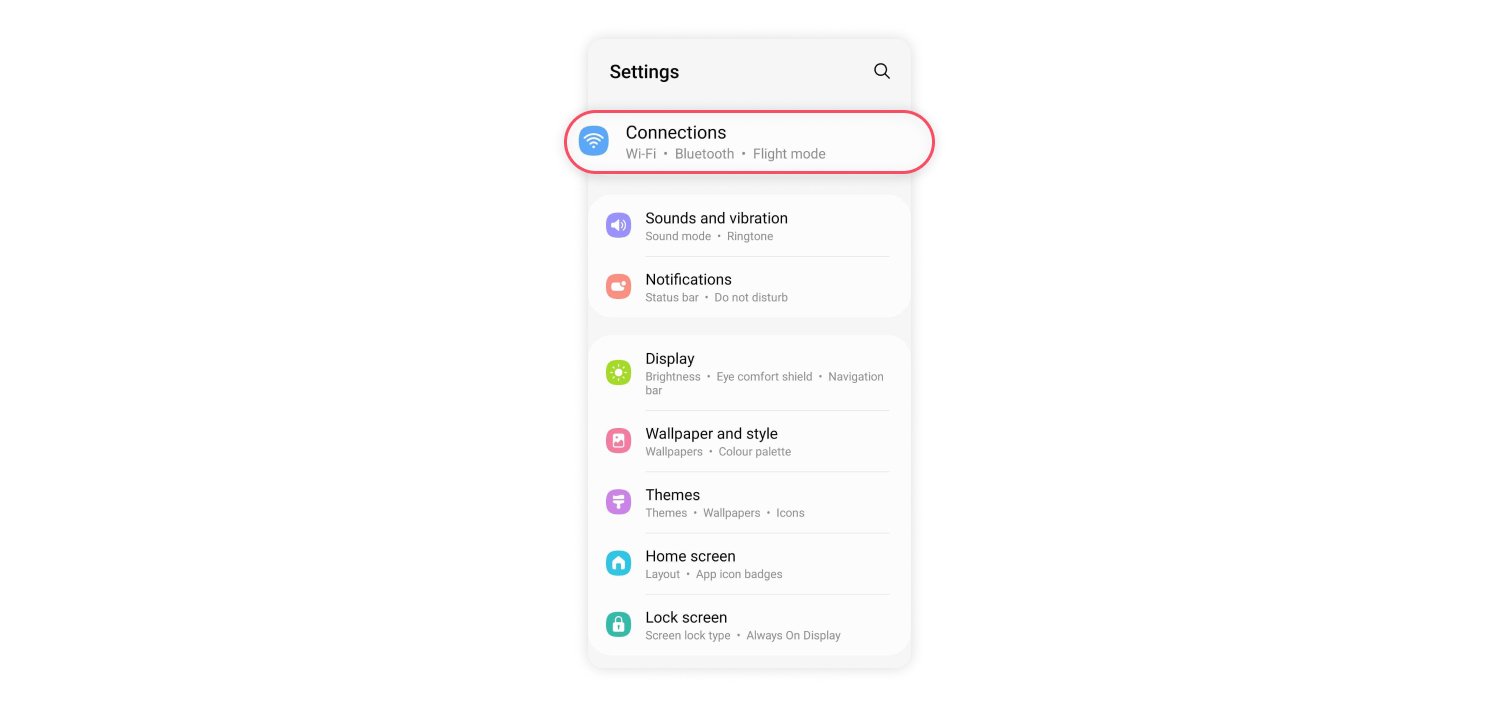
- Tap on “Connections.”
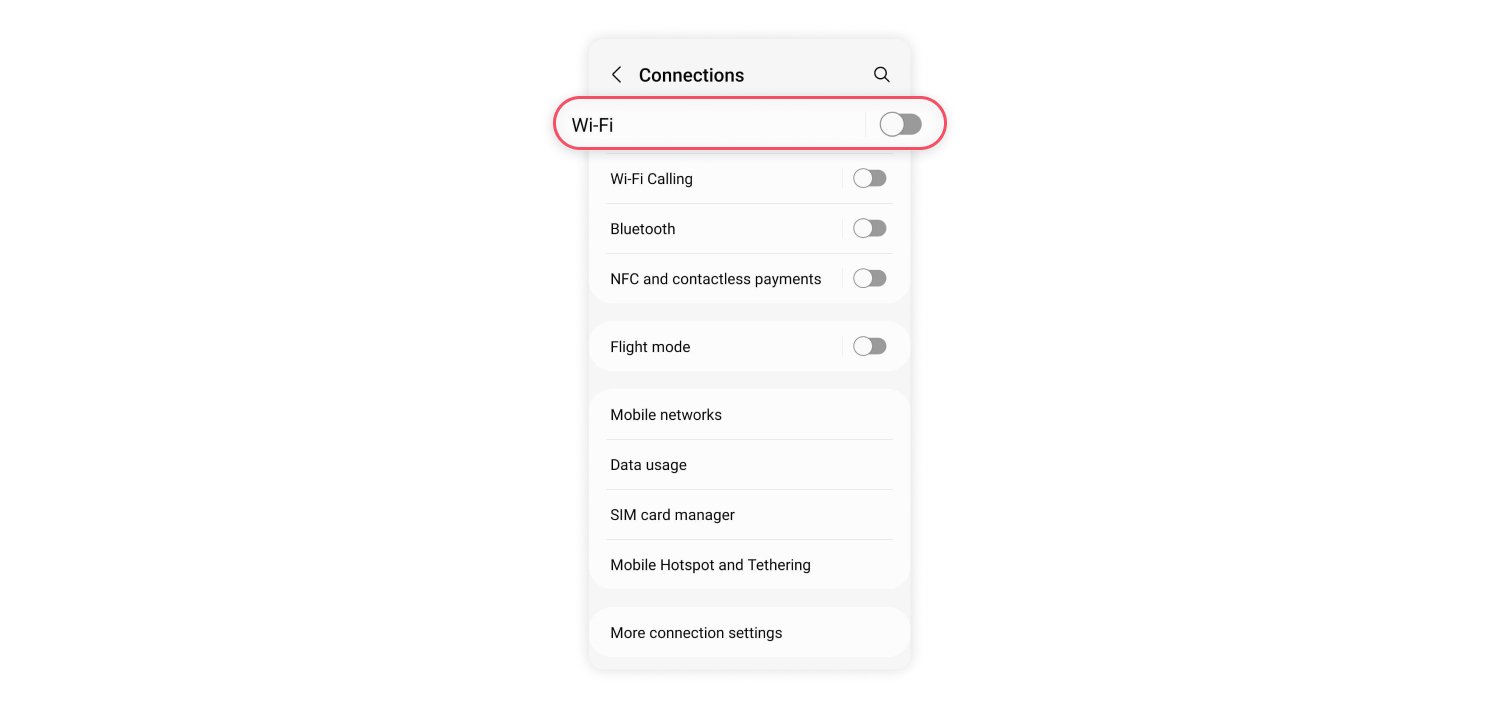
- Click on “Wi-Fi.”
- Tap on the selected Wi-Fi network, and then choose “Forget.”

After this, log in to this network as usual.
Assign a static IP address to your device
If your device cannot obtain an IP address automatically, you may try to assign one manually. However, this workaround is temporary as you will need to reconfigure your network settings manually, turn off your Wi-Fi, and restart your phone each time you connect to a different network.
To assign an IP, you should:
- Go to “Settings.”
- Tap on “Connections.”
- Choose “Wi-Fi.”
- Tap the selected Wi-Fi network, and then choose “Forget.”
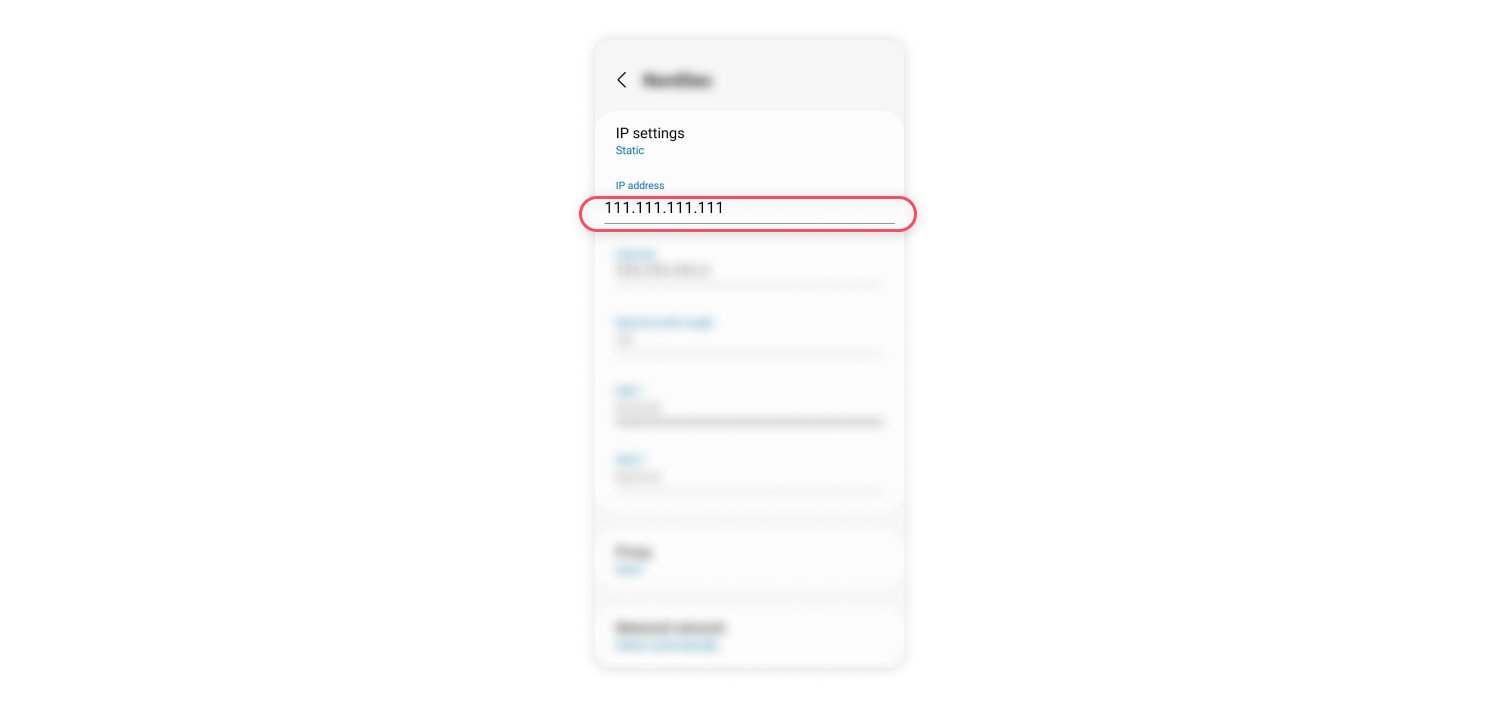
- Try reconnecting to a network and choose “IP settings.”
- Select “Static.”
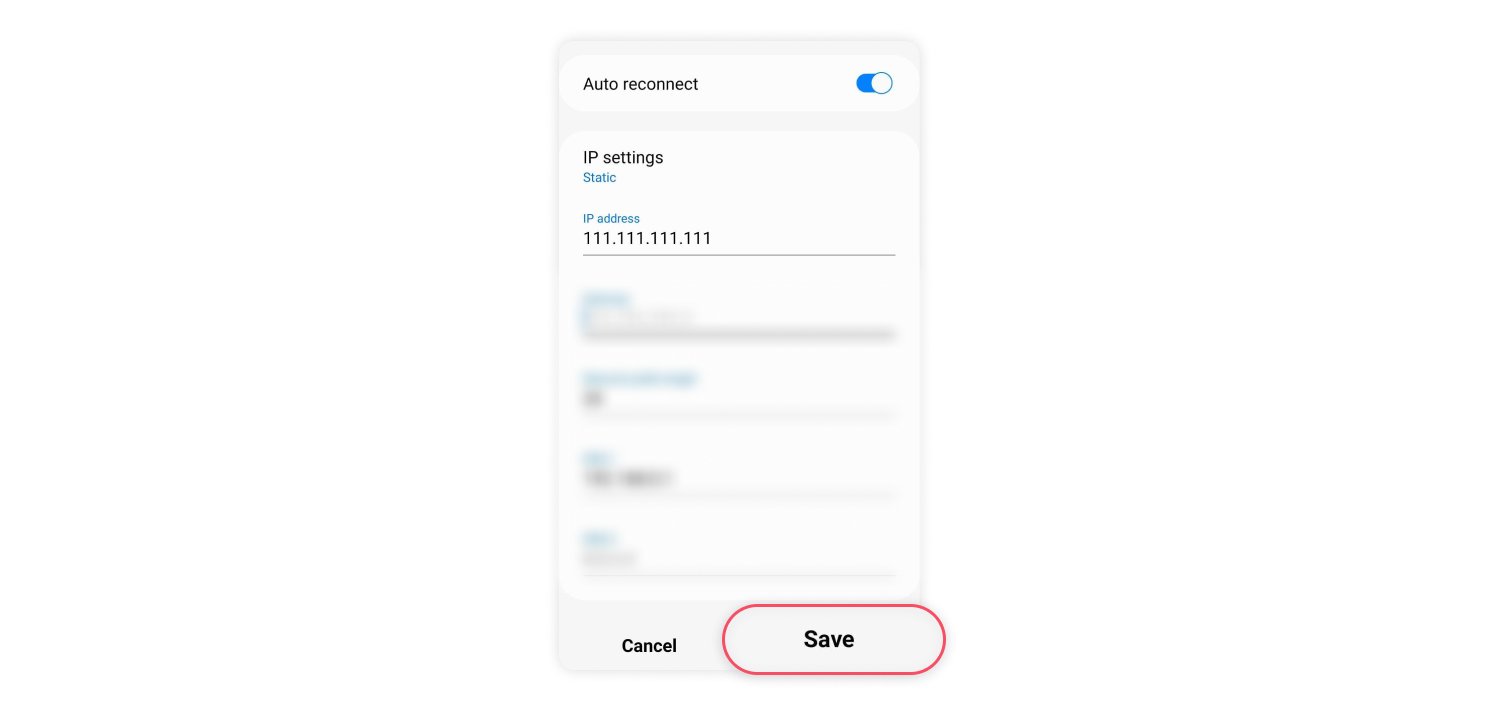
- In the “IP Address” field, change the last digit of your IP address to any number between 1 to 225.
- Click “Save” and retry the connection.
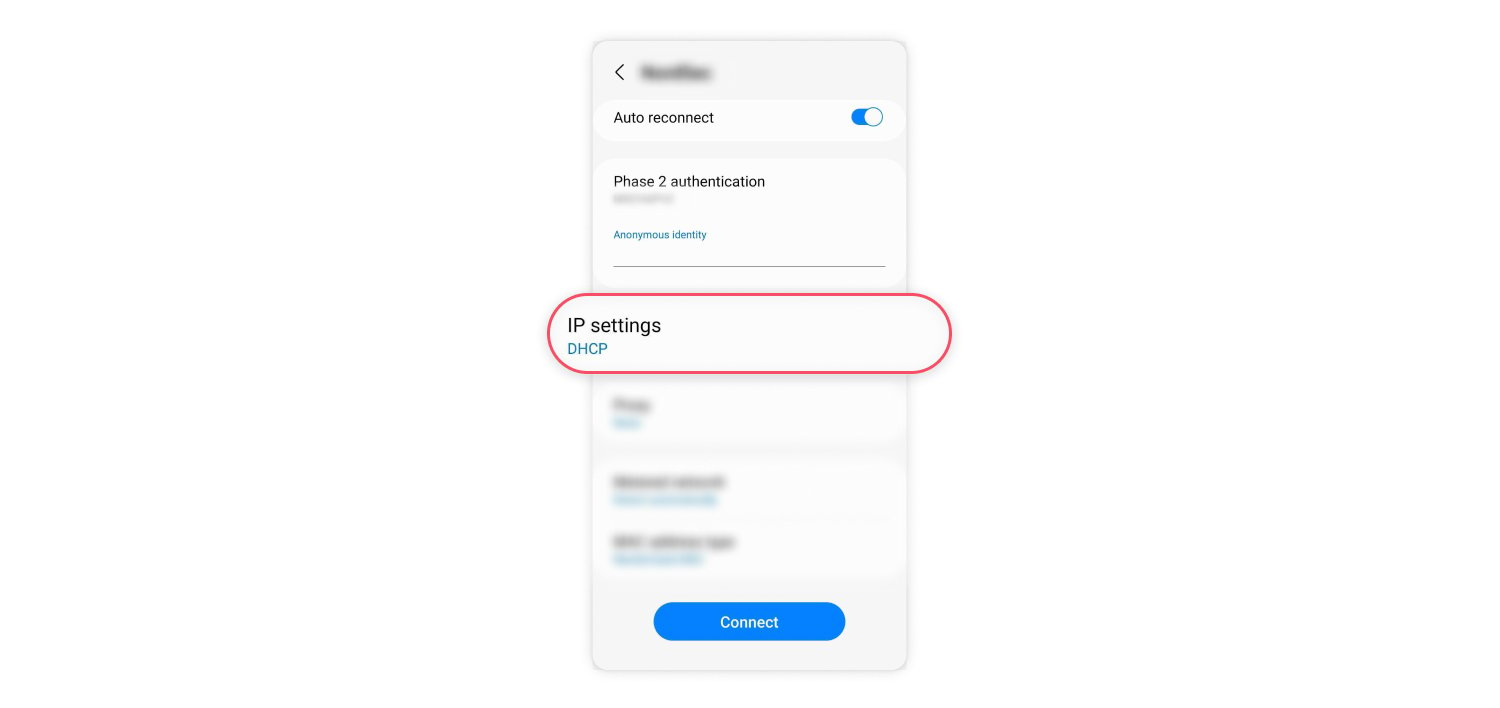

Note that you should be able to find your router IP address. Sometimes, it is also displayed on the router.
Restart your router or mobile device
This is a pretty straightforward method. It should work if the reason is some software glitch or conflict. Each router model has its control interface, so the process of restarting it might differ. Usually, you should enter the router’s IP in the browser to access the control panel and restart it there. To restart your Android phone, hold the power button for a few seconds, and then choose “Power Off.”
Change the encryption type
WPA and AES encryption methods sometimes do not work properly with some Android devices. You might try switching between them. As with the previous method, you will find these settings in the router’s web interface. They will most likely be filed under the security section. Look for “Encryption Mode”, “Encryption Method”, or similarly named field and try changing it. After this, reconnect to a network as per the first method.
Turn off MAC filtering
MAC address is a unique number assigned to computer hardware connecting to a network. MAC filter allows only allowlisted MAC addresses to connect to a network. Your address might not be among those. To disable MAC filtering, log in to your router’s interface via a web browser and look for the “Disable/Enable MAC Filtering” or similarly named section.
Turn flight mode on and off
The flight mode restarts phone settings, so if the issue is some software disruptions or similar, this method might help. To enable it, swipe down from the top of the screen and tap the “Flight Mode” button.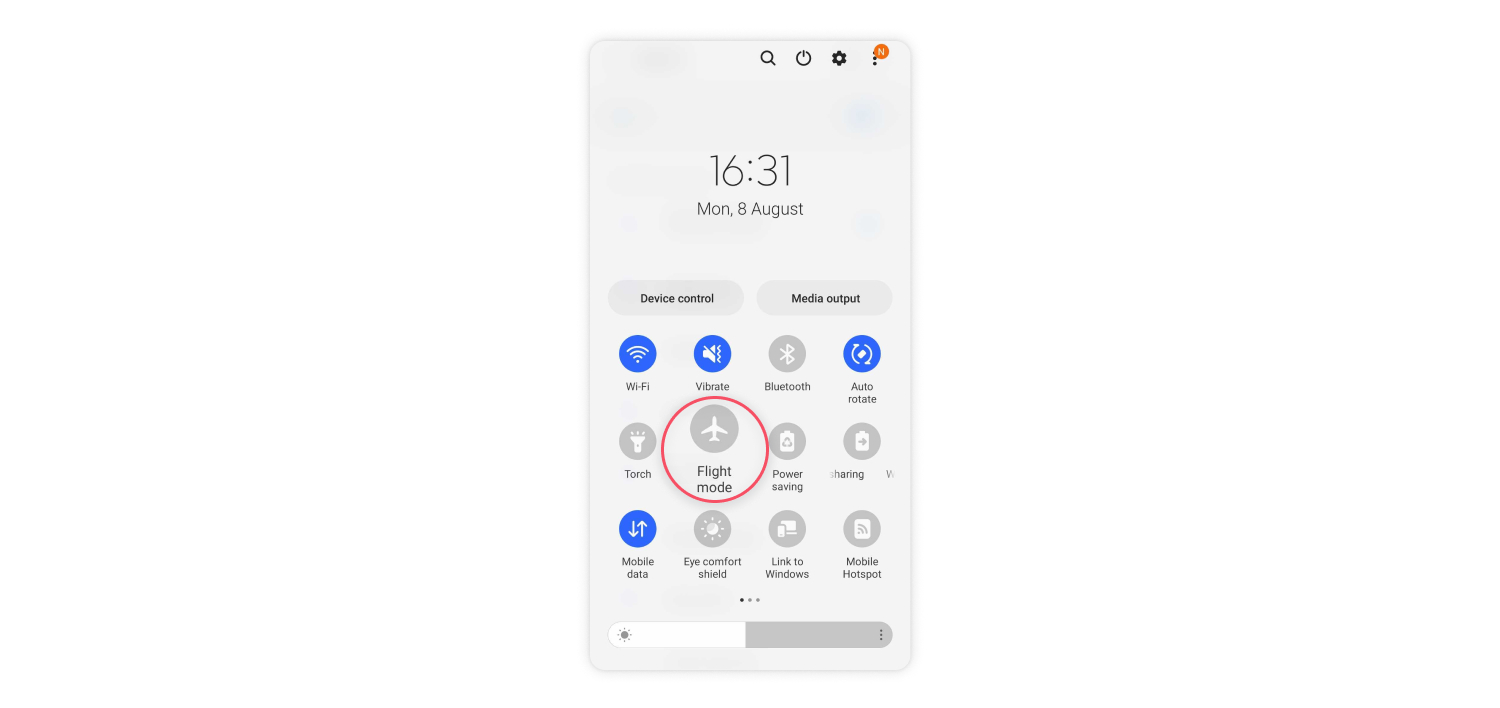
Sometimes it’s easier to have someone talk you through tech issues and security measures. That’s where the official NordVPN YouTube channel comes in. Why not check it out and see if there are any security tips that could enhance your online experience.
Get the latest cybersecurity news and tips.
Subscribe to NordVPN on Youtube